Create a Dynamic Rule Based on User License Plan

One of the great features in Azure AD is the ability to create Office 365 groups based on a set of rules that dynamically query user attributes to identify certain matching conditions. For example, I can create a dynamic membership rule that adds users to an Office 365 group if the user’s “state” property contains “NC”.

1_NCQuery

Pretty simple….

Recently, a partner asked me how they could create a dynamic membership rule that queries for users who have a specific license plan, such as an E3 or E5. It’s easy enough to get that information out of the Office 365 admin portal and create a group with assigned membership (where I statically add them to a group), but they wanted a dynamic group membership rule.

It takes a little work, but it’s not too difficult.

First, the dynamic membership rule must query for something that is unique to the E3 or E5 license plan.

So, once you connect to your tenant using the Azure AD PowerShell module, run the PowerShell script below. This will give you all the SKU’s and SKU ID’s that exist in your tenant.

$allSKUs=Get-AzureADSubscribedSku
$licArray = @()
for($i = 0; $i -lt $allSKUs.Count; $i++)
{
$licArray += “Service Plan: ” + $allSKUs[$i].SkuPartNumber
$licArray +=  Get-AzureADSubscribedSku -ObjectID $allSKUs[$i].ObjectID | Select -ExpandProperty ServicePlans
$licArray +=  “”
}
$licArray

In my case, I see this sort of output for the E5 SKU, indicated by ENTERPRISEPREMIUM as the Service Plan.

Notice the FORMS_PLAN_E5 designation:

2_E5 SKU

A little further down, I see ENTERPRISEPACK as a Service Plan, which indicates an E3 SKU.

Notice the FORMS_PLAN_E3 designation:

3_E3 SKU

For this example, I want a dynamic membership group containing users with an E3 SKU. The FORMS_PLAN_E3 distinguishes those users from the users who have the FORMS_PLAN_E5 SKU, so I can key off that value. I could have selected another SKU with “E3” at the end of the name, but I picked the one for Forms.

Next, I take the SKU ID for the FORMS_PLAN_E3 (beginning with 2789c901-) and make it part of an advanced query, like this:

user.assignedPlans -any (assignedPlan.servicePlanId -eq “2789c901-c14e-48ab-a76a-be334d9d793a” -and assignedPlan.capabilityStatus -eq “Enabled”)

4_DynamicRule

I add it to my advanced rule and click Save.

After a few minutes, the query enumerates the users with the E3 SKU and adds them to the dynamic group.

5_Dynamic membership

What makes this so convenient is that, if later on I license more users with E3, they will be added to the group dynamically as well.

Have fun with your dynamic groups!

Keeping the Lights On: Business Continuity for Office 365

Early in my career at Microsoft, I worked in Microsoft Consulting Services, supporting organizations looking to deploy Exchange 2007 and 2010 in their on-premises environments. During those engagements, the bulk of the conversations focused on availability and disaster recovery concepts for Exchange – things like CCR, SCR and building out the DAG to ensure performance and database availability during an outage – whether it was a disk outage, a server outage, a network outage or a datacenter outage.

Those were fun days. And by “fun”, I mean “I’m glad those days are over”.

It’s never a fun day when you have to tell a customer that they CAN have 99.999% availability (of course – who DOESN’T want five 9’s of availability??) for their email service, but it will probably cost them all the money they make in a year to get it.

Back then, BPOS (Business Productivity Online Service) wasn’t really on the radar for most organizations outside of some larger corporate and government customers.

Then on June 28, 2011, Microsoft announced the release of Office 365 – and the ballgame changed. In the years since then, Office 365 has become a hugely popular service, providing online services to tens of thousands of customers and millions of users.

As a result, more businesses are using Office 365 for their business-critical information. This, of course, is great for our customers, because they get access to a fantastic online service, but it requires a high degree of trust on the part of customers that Microsoft is doing everything possible to preserve the confidentiality, integrity and availability of their data.

A large part of that means that Microsoft must ensure that the impact of natural disasters, power outages, human attacks, and so on are mitigated as much as possible. I recently heard a talk given that dealt with how Microsoft builds our datacenters and account for all sorts of disasters – earthquakes, floods, undersea cable cuts – even mitigations for a meteorite hitting Redmond!

It was an intriguing discussion and it’s good to hear the stories of datacenter survivability in our online services, but the truth is, customers want and need more than stories. This is evidenced by the fact that the contracts that are drawn up for Office 365 inevitably contain requirements related to defining Microsoft’s business continuity methodology.

Our enterprise customers, particularly those from regulated industries, are routinely required to perform business continuity testing to demonstrate that they are taking the steps necessary to keep their services up and running when some form of outage or disaster occurs.

The dynamics change somewhat when a customer moves to Office 365, however. These same customers now must assess the risk of outsourcing their services to a supplier, since the business continuity plans of that supplier directly impact the customer’s adherence to the regulations as well. In the case of Office 365, Microsoft is the outsourced supplier of services, so Microsoft’s Office 365 business continuity plans become very relevant.

Let’s take a simple example:

A customer named Contoso-Med has a large on-premises infrastructure. If business continuity testing were being done in-house by Contoso-Med and they failed the test, they would be held responsible for making the necessary corrections to their processes and procedures.

Now, just because Contoso-Med has moved those same business processes and data to Office 365, they are not absolved of the responsibility to ensure that the services meet the business continuity standards defined by regulators. They must still have a way of validating that Microsoft’s business continuity processes meet the standards defined by the regulations.

However, since Contoso-Med doesn’t get to sit in and offer comments on Microsoft’s internal business continuity tests, they must have another way of confirming that they are compliant with the regulations.

First…a Definition

Before I go much further, I want to clarify something.

There are several concepts that often get intermingled and, at times, used interchangeably: high availability, service resilience, disaster recovery and business continuity. We won’t dig into details on each of these concepts but suffice it to say they all have at their core the desire to keep services running for a business when something goes wrong. However, “business continuity and disaster recovery” from Microsoft’s perspective means that Microsoft will address the recovery and continuity of critical business functions, business system software, hardware, IT infrastructure services and data required to maintain an acceptable level of operations during an incident.

To accomplish that, the Microsoft Online Service Terms (http://go.microsoft.com/?linkid=9840733),which is sometimes referred to as simply the OST, currently states the following regarding business continuity:

  • Microsoft maintains emergency and contingency plans for the facilities in which Microsoft information systems that process Customer Data are located
  • Microsoft’s redundant storage and its procedures for recovering data are designed to attempt to reconstruct Customer Data in its original or last-replicated state from before the time it was lost or destroyed


Nice Definition. But How Do You Do It?

I’ve referenced the Service Trust portal in a few other blog posts and described how it can help you track things like your organization’s compliance for NIST, HIPAA or GDPR. It’s also a good resource for understanding other efforts that factor into the equation of whether Microsoft’s services can be trusted by their customers and partners.

A large part of achieving that level of trust relates to how we set up the physical infrastructure of the services.

To be clear, Microsoft online services are always on, running in an active/active configuration with resilience at the service level across multiple data centers. Microsoft has designed the online services to anticipate, plan for, and address failures at the hardware, network, and datacenter levels. Over time, we have built intelligence into our products to allow us to address failures at the application layer rather than at the datacenter layer, which would mean relying on third-party hardware.

As a result, Microsoft is able to deliver significantly higher availability and reliability for Office 365 than most customers are able to achieve in their own environments, usually at a much lower cost. The datacenters operate with high redundancy and the online services are delivering against the financially backed service level agreement of 99.9%.

The Office 365 core reliability design principles include:

  • Redundancy is built into every layer: Physical redundancy (through the use of multiple disk, network cards, redundant servers, geographical sites, and datacenters); data redundancy (constant replication of data across datacenters); and functional redundancy (the ability for customers to work offline when network connectivity is interrupted or inconsistent).
  • Resiliency: We achieve service resiliency using active load balancing and dynamic prioritization of tasks based on current loads. Additionally, we are constantly performing recovery testing across failure domains, and exercising both automated failover and manual switchover to healthy resources.
  • Distributed functionality of component services: Component services of Office 365 are distributed across datacenters and regions to help limit the scope and impact of a failure in one area and to simplify all aspects of maintenance and deployment, diagnostics, repair and recovery.
  • Continuous monitoring: Our services are being actively monitored 24×7, with extensive recovery and diagnostic tools to drive automated and manual recovery of the service.
  • Simplification: Managing a global, online service is complex. To drive predictability, we use standardized components and processes, wherever possible. A loose coupling among the software components results in a less complex deployment and maintenance. Lastly, a change management process that goes through progressive stages from scope to validation before being deployed worldwide helps ensure predictable behaviors.
  • Human backup: Automation and technology are critical to success, but ultimately, its people who make the most critical decisions during a failure, outage or disaster scenario. The online services are staffed with 24/7 on-call support to provide rapid response and information collection towards problem resolution.

These elements exist for all the online services – Azure, Office 365, Dynamics, and so on.

But how are they leveraged during business continuity testing?

Each service team tests their contingency plans at least annually to determine the plan’s effectiveness and the service team’s readiness to execute the plan. The frequency and depth of testing is linked to a confidence level which is different for each of the online services. Confidence levels indicate the confidence and predictability of a service’s ability to recover.

For details on the confidence levels and testing frequencies for Exchange Online, SharePoint Online and OneDrive for Business, etc… please refer to the most recent ECBM Plan Validation Report available on the Office 365 Service Trust Portal.

BC/DR Plan Validation Report – FY19 Q1

A new reporting process has been developed in response to Microsoft Online Services customer expectations regarding our business continuity plan validation activities. The reporting process is designed to provide additional transparency into Microsoft’s Enterprise Business Continuity Management (EBCM) program operations.

The report will be published quarterly for the immediately preceding quarter and will be made available on the Service Trust Portal (STP). Each report will provide details from recent validations and control testing against selected online services.

For example, the FY19 Q1 report, which is posted on the Service Trust Portal (ECBM Testing Validation Report: FY19 Q1), includes information related to 9 selected online services across Office 365, Azure and Dynamics, with the testing dates and testing outcomes for each of the selected services.

The current report only covers a subset of Microsoft cloud services, and we are committed to continuously improving this reporting process.

If you have any questions or feedback related to the content of the reporting, you can send an email to the Office 365 CXP team at cxprad@microsoft.com.

Additional Business Continuity resources are available on the Trust Center , Service Trust Portal, Compliance Manager and TechNet

  1. Azure SOC II audit report:  The Azure SOC II report  discusses business continuity (BC) starting on page 59 of the report, and the auditor confirms no exceptions noted for BC control testing on page 95.
  2. Azure SOC Bridge Letter Oct-Dec 2018 : The Azure SOC Bridge letter confirms that there have been no material changes to the system of internal control that would impact the conclusions reached in the SOC 1 type 2 and SOC 2 type 2 audit assessment reports.
  3. Global Data Centers provides insights into Microsoft’s framework for datacenter Threat, Vulnerability and Risk Assessments (TVRA)
  4. Office 365 Core – SSAE 18 SOC 2 Report 9-30-2018: Similar to the Azure  365 SOC II audit report (dated 10/1/2017 through 9/30/2018) discusses Microsoft’s position on business continuity (BC) in Section V, page 71 and the auditor confirms no exceptions noted for the CA-50 control test on page 66.
  5. Office 365 SOC Bridge Letter Q4 2018 : SOC Bridge letter confirming no material changes to the system of internal control provided by Office 365 that would impact the conclusions reached in the SOC 1 type 2 and SOC 2 type 2 audit assessment reports.
  6. Compliance Manager’s Office 365 NIST 800-53 control mapping provides positive (PASS) results for all 51 Business Continuity Disaster Recovery (BCDR)-related controls within Microsoft Managed Controls section, under Contingency Planning. For example, the Exchange Online Recovery Time  Objective and Recovery Point Objective (EXO RPO/RTO) metrics are tested by the third-party auditor per NIST 800-53 control ID CP2(3). Other workloads, such as SharePoint Online, were also audited and discussed in the same control section.
  7. ISO-22301  This business continuity certification has been awarded to Microsoft Azure, Microsoft Azure Government, Microsoft Cloud App Security, Microsoft Intune, and Microsoft Power BI. This is a special one. Microsoft is the first (and currently the ONLY) hyperscale cloud service provider to receive the ISO 22301 certification, which is specifically targeted at business continuity management. That’s right. Google doesn’t have it. Amazon Web Services doesn’t have it. Just Microsoft.
  8. The Office 365 Service Health TechNet article provides useful information and insights related to Microsoft’s notification policy and post-incident review processes
  9. The Exchange Online (EXO) High Availability TechNet article outlines how continuous and multiple EXO replication in geographically dispersed data centers ensures data restoration capability in the wake of messaging infrastructure failure
  10. Microsoft’s Office 365 Data Resiliency Overview outlines ways Microsoft has built redundancy directly into our cloud services, moving away from complex physical infrastructure toward intelligent software to build data resiliency
  11. Microsoft’s current SLA commitments for online services
  12. Current worldwide up times are reported on Office 365 Trust Center Operations Transparency
  13. Azure SLAs and uptime reports are found on Azure Support

As you can see, there are a lot of places where you can find information related to business continuity, service resilience and related topics for Office 365.

This type of information is very useful for partners and customers who need to understand how Microsoft “keeps the lights on” with its Office 365 service and ensures that customers are able to meet regulatory standards, even if their data is in the cloud.


Requesting a FINRA/SEC 17a-4 Attestation Letter for Office 365

One of the strengths of Microsoft’s cloud services is the deep and broad list of technical certifications that the services have achieved. These include various common standards, such as SOC I and II, and SSAE. Additionally, Microsoft meets various country-specific government standards, such as FedRAMP.

But before we go any further, it’s important to make a distinction between a “certification” and an “attestation”, because they sometimes get used interchangeably when referring to Office 365 compliance.

  • Certifications are industry standards, such as ISO and SOC that are audited by a 3rd party. Microsoft is required to operate their datacenters and services according to those audited standards.
  • Attestations, on the other hand, are more like 3rd party guidance, or opinions, related to specific regulations. They are reference documents created by a 3rd party that say, “Yes, the necessary controls exist in Office 365 so that you can configure your tenant to meet a given regulation.” For example, it could be HIPAA for medical and health customers, FERPA for education or FINRA for the financial industry. These attestations often provide implementation guidance, but the important point here is that the responsibility is on the customer to configure the controls in the tenant to meet the regulation. What the attestation does is confirm that the necessary controls exist in Office 365 that will allow the customer to meet that regulation.

The point of these certifications and attestations is not simply to be able to tick a checkbox on an RFP. Rather, these certifications and attestations form a foundation of trust that helps assure customers that their data, identities and privacy is being handled in a responsible way, according to a set of standards defined outside of Microsoft.

There are numerous resources a customer or partner can go to and get information about specific compliance requirements, but sometimes it can be hard to track down exactly what you’re looking for – simply because there is SO MUCH information and it’s categorized and stored in different locations.

Take for example, the SEC 17a-4 letters of attestation, which are often referred to as the FINRA attestation letters. To be clear, SEC 17a-4 is the regulation, whereas FINRA is actually the agency that enforces the regulation. (Yes, the SEC is also an enforcement agency, but let’s not muddy the waters.) These letters may be required by a customer to confirm that Office 365 meets certain regulations of the Financial Industry Regulatory Agency (FINRA) in the United States.

Since neither the customer nor the SEC have direct access to the Office 365 cloud environment, Microsoft bridges the gap through these letters of attestation to the SEC on behalf of the requesting customer.

These letters affirm, among other things, that the Office 365 service – and specifically the Immutable Storage for Azure Blobs that are the underpinnings of the Office 365 storage services – can be leveraged by the customer to preserve their data on storage that is non-rewriteable and non-erasable.

The next question is – where can a customer get that letter? Let’s talk for a moment about the various resource locations available for a customer to review to find the information they might require. (You can also skip straight to the end to get the answer about FINRA, but you’ll miss some interesting stuff.)

Trust Center
The Trust Center Resources are located at https://www.microsoft.com/en-us/trustcenter/resources

Here, you can use the drop-down selections to find articles, blogs, whitepapers, e-books, videos, case studies and other resources related to Microsoft’s compliance to different types of regulatory standards.

For example, in the screenshot below, I’ve narrowed my search down to any type of resource related to the financial industry in North America related to compliance in Office 365. The result is a single document, named IRS 1075 backgrounder.

1_TrustCenter

That’s probably interesting in a different scenario, but it’s not a FINRA attestation letter, so it won’t help me in this instance.

Let’s dig some more…

Office 365 Security and Compliance Center

The next place I might look is the Office 365 Security and Compliance Center. I can get to this location in my Office 365 tenant (whether it’s a paid or a demo tenant) by going to my Admin portal, then to Admin centers, and then Security & Compliance.

Under the Service assurance section, I click on Compliance Reports.
2_ComplianceReports

From here, I have the ability to sort my reports according to the type of reporting I’m interested in, such as FedRAMP (for US federal government customers) and GRC (which simply means Governance, Risk and Compliance) and others.

For your reference, the same documents are available in the Trust Center here: https://servicetrust.microsoft.com/ViewPage/MSComplianceGuide

In looking through these documents, there is plenty to see, but nothing that specifically references FINRA.

Let’s look at the next blade – Trust Documents.

3_TrustDocuments

The default section that opens is a list of FAQs and Whitepapers, but the second section on the page is Risk Management Reports. This includes results of penetration testing and other security assessments against the cloud services, but again, no attestation letters.

4_PenTest

The last section to click on is Compliance Manager.

4.5_CompMgr

The Compliance Manager tool can be accessed at any time by going to https://servicetrust.microsoft.com/ComplianceManager and logging in with your Office 365 credentials.

In Compliance Manager, you can track your organization’s level of compliance against a given regulation, such as GDPR, FedRAMP or HIPAA. I won’t go into a lot of detail about Compliance Manager here, but the basic idea is that you define the service you are interested in evaluating and the certification you’re interested in, as seen in the screenshot below.

5_ComplianceMgr

As an example, let’s select HIPAA.

What I see now is a gauge that shows how far along my organization is in implementing all the controls related to HIPAA. Some of these controls are managed by Microsoft (such as those related to datacenter security) and others are managed by the customer (such as the decision to encrypt data).

6_HIPAAGauge

First, I see the actual control ID, title and a description of the control, as it is defined in the HIPAA documentation. This allows me to get a quick overview of the regulation itself.

7_HIPAAControl

You can also see information about how you could meet the requirements for this control using Microsoft products. The screenshot below shows how Azure Information Protection and Customer Managed Keys in Office 365 could help you meet the requirement for this HIPAA control.

8_HowToDoIt

Next, I see a list of related controls, so that, if there are areas of overlap, I don’t necessarily need to spend a lot of time and effort planning how to implement this control. For example, in the screenshot below, if my organization has already configured the controls for ISO 27018:2014: C.10.1.1, then I can simply verify that this would also meet the HIPAA control listed in the screenshot above.

9_RelatedControls

I can then use the last section to provide my supporting documentation and the date of my validation testing, along with the test results.

10_ProjectMgmt

Compliance Manager is a powerful tool for tracking your adherence to certain regulations, but it’s still not a FINRA attestation letter.

FINRA Attestation Letter Process

The actual process for requesting a FINRA attestation letter is not very complicated at all. Go back to your main Office 365 Admin portal page and open a New service request under the Support section.

11_SupportTicket

You can choose to submit a “New service request by email”, ensuring that “FINRA attestation letter” is noted at the beginning of your documentation.

The support engineer who gets the ticket will be directed to pass this along to an escalation team.

Based upon the information exchanged with the customer, the escalation team will engage CELA (Microsoft’s legal group) and they will get the attestation letter generated and executed. The final letter will look somewhat similar to this, but the highlighted areas will have the actual customer name and address.

12_FINRALetter

Note that this process carries a 10-day SLA.

When the support ticket has been opened the support engineer will provide the information shown below, and then they will work with the customer to collect specific tenant-level information that ensures the accuracy of the prepared document.

Microsoft’s position, confirmed by is that Office 365 provides administrators with configuration capabilities within Exchange Online Archiving to help customers achieve compliance with the data immutability and data storage requirements of SEC Rule 17a-4. 

 The Azure external review confirms the ability for customers to achieve compliance with the data immutability and data storage requirements of SEC Rule 17a-4.

 Microsoft actively seeks to help our customers achieve compliance with the many and varied regulatory requirements found in domestic and international jurisdictions. That said, it is important to note that while Microsoft will do all we can to assist, Microsoft itself is a not a regulated entity and does not directly comply with the SEC 17a-4 regulation.

 Financial services firms are the regulated entities and as such remain responsible for direct compliance with the applicable rules when using Microsoft technologies. Due to the many variances within customer environments, financial services firms themselves need to ensure all appropriate steps have been taken to meet the regulatory requirements, including using Microsoft’s online services appropriately and training employees to do the same.

Microsoft has published the blog, Office 365 SEC 17a-4 , which offers customer-ready information along with the capability to download our whitepaper.   

The SEC 17a-4 requires the regulated entity to secure a secondary resource to provide the archived data to the SEC upon request, should the regulated entity not be able or willing to provide the data to the SEC directly.  Microsoft will provide data to the SEC under the terms of the regulation for Office 365 customers who remain actively licensed for the service. Data for customers who exit the service will only be retained per the current data retention policies.  Microsoft will attest to meeting SEC requests for data by providing customers with the required Letter of Undertaking, addressed to the SEC and referencing the regulated entity. This letter is described within the regulation, under section 17a-4(f)(3)(vii).

The SEC 17a-4 also requires the regulated entity to attest to the immutability, quality, formatting and indexing of the archived data. This requirement is referred to as Electronic Storage Medium (ESM) Representation under section 17a-4(f)(2)(i). Microsoft will attest to the ESM capability by providing customers with the required Letter of Attestation, Electronic Storage Media Services, addressed to the SEC and referencing the regulated entity.

Hopefully, this information helps you as you work to meet FINRA compliance requirements in your Office 365 tenant.

UPDATE: On January 28, 2019, Microsoft published an article describing how Exchange Online and the Security and Compliance Center can be used to comply with SEC Rule 17a-4.

The article includes a link to the Cohasset assessment, which, it is important to note, also contains information related to Skype for Business Online. The reason for this is that Skype for Business and Microsoft Teams store data in Exchange for the purposes of eDiscovery and data retention/archival.

I encourage you to read this article as well!

Use Exchange Online and the Security & Compliance Center to comply with SEC Rule 17a-4

Are You Following Teams Tuesdays?

Microsoft Teams has proven to be one of the biggest product releases of FY18 for Microsoft, with over 200,000 customers rolling it out within just a year!

If your organization hasn’t yet rolled out Teams, or if you are in the middle of planning your deployment, be sure to check out the Microsoft Teams webinar series, being delivered by the One Commercial Partner Modern Workplace team of architects.

This is what’s on the agenda for the Teams Tuesday webinars for the next few months!


August 21, 2018

Using Automation to Provision Teams, Groups and Modern Communication Sites

In this webinar, we’ll provide you with guidance on how you can leverage automation to standardize, secure and simplify your Microsoft Teams rollout.


August 28, 2018

Understanding the Microsoft Teams Free Version

The new free version of Microsoft Teams raises a lot of questions for partners and customers alike. In this session, we’ll walk you through the limitations and use case scenarios for the freemium version of Teams and help you articulate the value of the full version.


September 4, 2018

Quality Management for Microsoft Teams

How do you prepare you network for the increased audio and video traffic that comes along with a Microsoft Teams deployment? And then once you have it deployed, how do you validate the quality on an ongoing basis? Join Andy McLaughlin in this session to learn the tricks of the trade!


September 18, 2018

Upgrade and Interop with SfB

There is a lot of confusion around the upgrade and interop story with Skype for Business Online and Microsoft Teams? How will it work? What are the caveats? What will partners need to do to transition customers? JoAnn Boxrud will help clear up the cobwebs in this webinar.


October 2, 2018

Managing Microsoft Teams Effectively

One of the great things about Microsoft Teams is that, once it takes hold in an environment, it spreads virally. As a partner, you may be asked to help manage this growth in a way that allows an organization to maintain control over data leakage, limit the use of guest access, standardize the way Teams are deployed, and so on. Robert Gates will provide tips form the pros in this webcast.


October 9, 2018

Planning for User adoption and Customer Success with Microsoft Teams

There’s much to consider when deploying Microsoft Teams. Join us for a discussion about what you can do today to help customer Teams deployments go smoothly. We provide the latest in guidance and outline the building blocks required to help make all of your Microsoft Teams customer deployments a success.


October 16, 2018

Deep Dive into Direct Routing

Direct Routing is one of the new capabilities in Teams to support Voice. What implementation options exist for Direct Routing? How do you configure Direct Routing? What are the requirements? Find out in this session.


October 23, 2018

Understanding Guest Access in Microsoft Teams

Guest Access in Microsoft Teams is one of the most important features in enabling collaboration between an organization and its partners, vendors and affiliates. What needs to be done to enable Guest Access? What are the limitations on what a guest can do? How do i audit guest access? These are some of the questions that will be covered in this webinar with Kevin Martins.


Look interesting? Then sign up here!

https://msuspartner.eventbuilder.com/?landingpageid=dst1ny

There are also lots of recorded webcasts that you can go back and review at your leisure.

Hope to see you on the next Teams Tuesday!


Leverage the Microsoft Graph with Azure Active Directory Identity Protection to Identify Network Threats

What is Azure Active Directory Identity Protection?

Azure Active Directory Identity Protection is a feature built into the Azure AD Premium P2 license. The P2 SKU is important if you want to configure SharePoint Limited Access, CAS Proxy, or perform actions related to identity protection or control of privileged identities. The Azure AD Premium P2 (AADP P2) licensing is included with the Enterprise Mobility & Security E5 license, but can be added on to other licensing, such as the EM&S E3 license.

What’s great about it is that it also allows you to use the Microsoft Graph to query your Azure AD tenant and identify potential threats to your organization and even configure an automated response to them. This post will show you how to find these sorts of events in your organization, with a very simple script.

It only takes about 5 minutes to set up, so let’s get started!

What Do I Need to Do This?

For the steps below, I’m using a trial tenant with Office 365 E5 and EM&S E5 licensing (which as mentioned above, includes the Azure AD Premium P2 licensing). This means I don’t have a fully-functioning Azure tenant, where I can set up virtual machines, web apps, containers and so on – but I have enough to do the steps below.

First, I log in to my Office 365 tenant and go to the Admin Centers and click on my Azure Active Directory admin center. I can, of course, just go to http://portal.azure.com and log in there, but this just helps illustrate the connection between the Office 365 tenant and Azure AD.


Click on the Azure Active Directory icon and see all the properties of the Azure Active Directory instance that underpins my Office 365 and EM&S tenant.


I click on App registrations, as shown below:


Click on New application registration


Now I fill in the properties for the new application registration.

The values below will work as shown.


Click Create when finished.

Click on the Settings gear as shown below:


One of the settings is Required permissions .

Click on the arrow to expand this property.

Next, click on Add to set up permissions for connecting to the Graph API.

You have the option of selecting which API you want to grant access to.

Click on the Select an API arrow.


You’ll now see a bunch of API’s that you can connect to.

For our purposes, we’ll choose the Microsoft Graph, which contains security event information.


Click Select at the bottom of that pane.

Now click on Select permissions.


In the Enable access page, scroll down till you see the Read all identity risk event information line.

Click the checkbox next to that line and then click Done.

You should see the Windows Graph in your Required permissions page.

Click on Grant permissions to apply the permissions you just selected.


When you click on Grant permissions, you’ll be asked for confirmation, so click Yes if you agree.


Back in the Settings page of your Application, click on Keys.


Configure an access key as shown below and click Save.


You should see the access key value in the field below.

Copy this key and save it somewhere. You’ll use it in the script as the $ClientSecret variable.


Back on the Properties of the application itself, you will also see the Application ID value.

Copy this value somewhere as well. This will be used in the script as the $ClientID variable.

Use a PowerShell script to connect to Microsoft Graph and Look for Identity Risk Events

The script below can be used to query the Microsoft Graph for identity risk events. You’ll need to fill in the following values:

  • $ClientID
  • $ClientSecret
  • $tenantdomain

For my script, it looked like the screen capture below.


I deleted the application after running the script so these credentials aren’t valid anymore.

Shown below is the sample script for querying the Microsoft Graph to capture identity risk events.

$ClientID       = "Application ID value from the Registered App properties page "       # Should be a ~36 hex character string; insert your info here
$ClientSecret   = "Password value from the Keys page" # Should be a ~44 character string; insert your info here
$tenantdomain   = "Tenant name"   # For example, contoso.onmicrosoft.com

$loginURL       = "https://login.microsoft.com"
$resource       = "https://graph.microsoft.com"
$body      = @{grant_type="client_credentials";resource=$resource;client_id=$ClientID;client_secret=$ClientSecret}
$oauth     = Invoke-RestMethod -Method Post -Uri $loginURL/$tenantdomain/oauth2/token?api-version=1.0 -Body $body
Write-Output $oauth
if ($oauth.access_token -ne $null) {
   $headerParams = @{'Authorization'="$($oauth.token_type) $($oauth.access_token)"}
   $url = "https://graph.microsoft.com/beta/identityRiskEvents"
   Write-Output $url
   $myReport = (Invoke-WebRequest -UseBasicParsing -Headers $headerParams -Uri $url)
   foreach ($event in ($myReport.Content | ConvertFrom-Json).value) {
       Write-Output $event
   }
} else {
   Write-Host "ERROR: No Access Token"
}


Once you fill in the appropriate values for your environment, you can run the script in PowerShell and it will find any identity risk events associated with your tenant.

What Information Does It Provide?

In my tenant, it found one identity risk event, as shown below:


What this tells me is that on February 26, 2018 there was an AnonymousIPRiskEvent that took place using Allan DeYoung’s user account.

It looks like someone logged in with his credentials using a TOR browser, and it was classified as a medium risk event.

Additionally, I am able to see the location where this event took place and the IP address associated with it.

From there, I am able to start tracking down what happened and see if it poses any risk to my network or Allan’s account.

What other types of events would we be able to identify? Microsoft Graph contains identify events such as:

  • Impossible travel to atypical locations (Did you log in from New York and then 5 minutes later try to log in from an IP address in Indonesia?)
  • Sign-in events from unfamiliar locations (Is the location you are signing in from outside of your typical login patterns?)
  • Sign-ins from an infected device (Is the device where the login was attempted communicating with a botnet server?)
  • Sign-ins from IP addresses with suspicious activity (Maybe an IP address where a number of login attempts are taking place for lots of different accounts, which could indicate a brute force password attack)

We can categorize the risk events because the Microsoft Graph maintains information related to billions of login events each month. That means we can detect anomalies and determine whether they are just a user who forgot their password three times, or some sort of automated attack against that user’s account.

This is a very simple example, but you could configure something like this to run periodically and dump the events to a SIEM, allowing you to collect all your security related events in a single place and have them reviewed by your security team.

There are LOTS of other event types you can query on using the Microsoft Graph API (and the other application-specific API’s). I encourage anyone who manages the security for a network to take advantage of these API’s and create automated scripts that can capture risk events on your network.

Have fun with Microsoft Graph!

Secure Your Office 365 Tenant – By Attacking It (Part 2)

By David Branscome


In my previous post (https://blogs.technet.microsoft.com/cloudyhappypeople/2018/04/04/secure-your-office-365-tenant-by-attacking-it ), I showed you how to use the Office 365 Attack Simulator to set up the Password Spray and Brute Force Password (Dictionary) Attacks.

What we often find, though, is that spear phishing campaigns are extremely successful in organizations and are often the very first point of entry for the bad guys.

Just for clarity, there are “phishing” campaigns and there are “spear phishing” campaigns.

A phishing campaign is typically an email sent out to a wide number of organizations, with no specific target in mind. They are usually generic in nature and are taking the approach of “spreading a wide net” in hopes of getting one of the recipients to click on a URL or open an attachment in the email. Think of the email campaigns you’ve likely seen where a prince from a foreign country promises you $30 million if you’ll click on this link and give him your bank account information. The sender doesn’t particularly care WHO gets the email, as long as SOMEBODY clicks on the links.

On the other hand, a spear phishing campaign is much more targeted. In a spear phishing campaign, the attacker has a specific organization they are trying to compromise – perhaps even a specific individual. Maybe they want to compromise the CFO’s account so that they can fraudulently authorize money transfers from the organization by sending an email that appears to be coming from the CFO. Or maybe they want to compromise a highly-privileged IT admin’s email account so that the attacker can send an email asking users to browse to a fake password reset page and harvest user passwords. The intent with a spear phishing campaign is to make the email look very legitimate so that the recipients aren’t suspicious – or perhaps they even feel obligated to do as instructed.

What Do I Need?

As you can imagine, setting up a spear-phishing campaign takes a little more finesse than a brute force password attack.

First, decide WHO the sender of the spear phishing email will be. Maybe it’s HR requesting that you log in and update your benefits information. Or perhaps it’s the IT group asking everyone to confirm their credentials on a portal they recently set up.

Next, decide WHO you want to target with the campaign. It may be the entire organization, but keeping a low profile as an attacker also has its advantages.

You’ll probably want to use a realistic HTML email format so that it looks legitimate. The Attack Simulator actually provides two sample templates for you, as we’ll see below. Using the sample templates makes the campaign very easy to set up, but as you get more comfortable using the Attack Simulator, you will likely want to craft your own email to look more like it’s coming from your organization.

That should be enough to get us started.

Launching a Spear Phishing Attack

In the Attack Simulator console, click on “Launch Attack”.


At the Provide a name to the campaign page, choose your own name, or click on “Use template”. If you click on “Use template” you will see two template options to choose from. I’ve chosen “Prize Giveaway” below:


Next, select the users you want to “phish”. You can select individual users or groups.


On the next page, if you’ve selected a template, all the details will be filled in for you. One important value to note here is the Phishing Login server URL. Select one of the phishing login servers from the drop down. This is the way the attack simulator is able to track who has clicked on the URL in the email and provides reporting.

Note that the URL’s for the phishing login servers are NOT actually bad sites. They are sites set up specifically for the purposes of this tool’s functioning.


In the Email body form, you can customize the default email. Make sure that you have a variable ${username} so that the email looks like it was sent directly to the end user.


Click Confirm, and the Attack Simulator will send the email out to the end users you specified.

Next, I opened the Administrator email account that I targeted and saw this:


Notice that it customized the email to the MOD Administrator account in the body of the email.

If I click on the URL (which points to the http://portal.prizesforall.com URL we highlighted earlier) I get sent to a website that looks like this.


Finally, if I click on the reporting area of the Attack Simulator, I can see who has clicked on the link and when.


Okay. But seriously…would you really have clicked on that URL?

Probably not.

So how do you make it a little more sophisticated?

Let’s create a more realistic attack.

In this attack we will use the Payroll Update template, which is very similar to what you might actually see in many corporate environments.  You can also create your own HTML email using your organization’s branding and formatting.


I’ll again target the MOD Administrator because he seems like a good target, since he’s the O365 global admin (and seems to be somewhat gullible).

In this situation though, instead of sending from what appears to be an external email address (prizes@prizesforall.com, used in the previous attack) I’m going to pose as someone the user might actually know. It could be the head of HR or Finance or the CEO. I’ll use the actual email address of that person so that it resolves correctly.

Notice that this templates uses a different phishing login server URL from the drop down. You’ll see why in a second.

In the Email body page, we’ve got a much more realistic looking email.

It should be noted, though, that if you make the email look ABSOLUTELY PERFECT and people click on the URL, what have they learned? It’s best to provide a clue in the email that a careful user would notice and recognize as a problem. Maybe send the official HR email from someone who isn’t actually in HR, or leave off a footer in the email that identifies it as an official HR email. Whatever it is, there should be something that you can use to train users to look out for.

So if you read the email template below carefully, you’ll see some grammatical errors and misspellings that should be a “red flag” to a careful user.


Again, you Confirm the settings for the attack and the attack launches.

Going to the MOD Administrator’s mailbox….that’s much more realistic, wouldn’t you say?


When I click on the “Update Your Account Details” link, I get sent to this page, where I’m asked to provide a username and password, which of course, I dutifully provide:


Notice, however, that the URL at the top of the page is the portal.payrolltooling.com website – even thought the page itself looks like a Microsoft login page. Many attacks will mimic a “trusted site” to harvest credentials in this manner. When you’re testing you can use any email address (legitimate or not) and any password for testing – it isn’t actually authenticating anything.

Once I enter some credentials, I am directed to the page below, which lets me know I’ve been “spear phished” and provides some hints about identifying these kind of attacks in the future:


And finally, in the reporting, I see that my administrator was successfully spear phished.


The Value of Attack Simulations

This is all interesting (and a little bit fun) but what does it really teach us? The objective is that once we know what sort of attacks our users are vulnerable to (password or phishing are the two highlighted by this tool), then we can provide training to help enhance our security posture. Many of the ransomware attacks that are blanketing the news lately started as phishing campaigns.

If we can take steps to ensure that our users are better equipped to identify suspicious email, and help them select passwords that aren’t easily compromised, we help improve the organization’s security posture.


Secure Your Office 365 Tenant – By Attacking It (Part 1)

By David Branscome

I’ve been waiting several months for this day to arrive. The Office 365 Attack Simulator is LIVE!

If you log into your Office 365 E5 tenant with the Threat Intelligence licensing, it shows up here in the Security & Compliance portal.

When you click on it, the first thing it will tell you is that there are some things you need to set up before you can run an actual attack. There’s a link that says, “Set up now” (in the yellow box shown below). After you click that link, it says the setup is complete, but you’ll have to wait a little while before running an attack. (I only had to wait about 10 minutes when I set it up)


It also reminds you that you need to have MFA (multi-factor authentication) set up on your tenant in order to run an attack. This makes a lot of sense, since you want to ensure that anyone who runs the attack is a “good guy” on your network.

To set up MFA, follow the steps here:

Go to the Office 365 Admin Center

Go to UsersActive users.

Choose MoreSetup Azure multi-factor auth


Find the people who you want to enable for MFA. In this case, I’m only enabling the admin account on my demo tenant.

Select the check box next to the people you want to enable for MFA.

On the right, under quick steps, you’ll see Enable and Manage user settings.

Choose Enable.


In the dialog box that opens, choose enable multi-factor auth.

The Attacks

Spear Phishing

With a spear phishing attack, I’m sending an email to group of “high-value” users – maybe my IT admins, the CEO/CFO, the accounting office, or some other user group whose credentials I want to capture. The email I send contains a URL that will allow me to capture user credentials or some other sensitive data as part of the attack. When I set up this attack, it needs to look like it’s coming from a trusted entity in the organization. Maybe I’ll set it up to make it appear as though it’s coming from the IT Security group asking them to verify their credentials.

Brute Force Password (a.k.a., Dictionary Attack)

In this attack, I’m running an automated attack that just runs through a list of dictionary-type words that could be used as a password. It is going to use lots of well-known variations, such as using “$” for “s” and the number 0 for the letter O. If you thought Pa$$w0rd123 was going to cut it as a secure password on your Office 365 account, this attack will show you the error of your ways.

This type of attack is pretty lengthy in nature because there are thousands of potential guesses being made against each user account. The attack can be set up to vary in frequency (time between password guesses) and number of attempts.

It’s important to note that if a password is actually found to be successful, that password is NOT exposed to anyone – even the admin running the attack. The reporting simply indicates that the attack was successful against Bob@contoso.com, for example.

Password Spray Attack

A password spray attack is a little different from the brute force password attack, in that it allows the admin/attacker to define a password to use in the attack. These would typically be passwords that are meaningful in some way – not simply an attempt using hundreds, or thousands of guesses. The password you use could be something like the name of a football team mascot and the year they won a championship, or the name of a project that people in one department are working on. Whatever criteria you select, you define what password or passwords should be attempted and the frequency of the attempts.

Ready? Let’s go hunting…

Launching a Password Spray Attack

First, I’ll try the password spray attack. I’ve set up several accounts in my test tenant with passwords that are similar to the one I’ll attempt to exploit – which is Eagles2018!. Notice that, by most criteria, that’s a complex password – upper and lower case, alphanumeric and it includes a special character, but it’s also a fairly easily-guessed password, since the Philadelphia Eagles won the Super Bowl in 2018 (though it pains me to say that).

I’ve set up a couple users with that password to ensure I get some results.

I go to my Attack simulator and click on Launch Attack.

The first screen is where I name the attack.


Next, I select the users I want to target. Notice that I can select groups of users as well.


Now I manually enter the passwords I want to use in the attack.


Confirm the settings, click Finish and the attack will begin immediately.

If I go back to my Attack Simulator console, I can see the attack running.


After the attack completes, I see the users who have been compromised using the password.

(Yes, I’ve reset their passwords now, so don’t try and get clever.) 😊

Now I politely encourage ChristieC and IrvinS to change their password to help ensure their account security.

Launching a Brute Force Password (Dictionary Attack)

Again, I’ve set up a couple accounts with some pretty common password combinations (P@ssword123, P@ssw0rd!, etc..)

I walk through the configuration of the attack, which is very similar to the Password Spray attack setup.


I set up my target users as before, and then I choose the attack settings.

In this case, I uploaded a text file containing hundreds of dictionary passwords, but you can create a sampling of several passwords by entering them manually one at a time in the field above the Upload button.


As the attack runs, you’ll see something like the screenshot below. Remember, if you have a large number of users and a very large wordlist for the dictionary attack, this attack will run for quite some time as the simulator cycles through all the possible variations for each user.


And again, when the simulation is complete, you’ll want to caution DiegoS on his lack of good password hygiene.

In my second blog post, I’ll show you how to do a Spear Phishing Attack. These are the REALLY sneaky ones….

Stay tuned!


“Argh…My Skype for Business Recording Failed!!”

By David Branscome


I recently received a call from a colleague who had been working on a two-hour Skype for Business meeting.

At the end of the call, she went into her Recording Manager to get the recorded meeting but saw that the recording for the meeting had failed. It was showing up as “0 bytes” in size.

When we browsed to C:Users%USERNAME%AppDataLocalMicrosoftCommunicatorRecording ManagerTemporary Recording Files we saw this:

So, we were pretty sure that the files were available, they just hadn’t been finalized at the end of the meeting into a single file. But how do you fix it?

Actually, the fix was pretty easy.

First, start a new Skype for Business meeting. It can be a meeting with just one person.

Once the meeting is started, share out your desktop.

Now start the recording.


Immediately afterward, pause the recording as shown below:


Go to the temporary recording files path:

C:Users%USERNAME%AppDataLocalMicrosoftCommunicatorRecording ManagerTemporary Recording Files and locate the folder with the temporary files for the RECORDING YOU JUST PAUSED. It should be easy to locate based on the time stamp.

Open that folder and delete all the files EXCEPT the file named lock.lock.

Next, go back to the C:UsersdabranAppDataLocalMicrosoftCommunicatorRecording ManagerTemporary Recording Files path and locate the folder for the FAILED recording. Again, you can use the timestamps on the files to ensure you have the right files. Select all the files in this folder and copy them using either CTRL-C or the Copy command

At this point, you should have all the files from the folder of the original FAILED Recording copied over into the folder for the NEW, paused recording.

Now, from your Skype for Business client, STOP the recording for the meeting you initiated earlier. This will start the process of combining all the files from the FAILED recording into a single, functional recording.


Go into your System Tray in the lower right corner and click on the Recording Manager icon and select “Open”


Ensure that the New recording is being compiled, as shown by the green progress bar.


In a few minutes (depending upon the length of the original meeting), your file should be completely recovered and ready to use!

The End of Support for Older TLS Versions in Office 365

by David Branscome, with a callout to Joe Stocker at Patriot Consulting for the heads-up!

The SSL/POODLE Attack Explained

UPDATE: As per the support article listed here (https://support.microsoft.com/en-us/help/4057306/preparing-for-tls-1-2-in-office-365) We will be extending support for TLS 1.0/1.1 through October 31, 2018 in order to help ensure our customers are adequately prepared for the changes.


As most of you know, there was a significant vulnerability identified in the SSL 3.0 protocol back in 2014, named POODLE (Padded Oracle On Downgraded Legacy Encryption).

The problem was this: SSL 3.0 is basically an obsolete and insecure protocol. As a result, it has been, for the most part, replaced by its successors, TLS 1.0 and TLS 1.2. The way a client-server encryption negotiation sequence would typically work is that the client would contact a server, and through a handshake process, agree on the highest level of security over which they both can communicate. So, for example, a client makes a request to a server and says, “I’d like to use TLS 1.2 for our communication, but I can also use TLS 1.0, if you need to.” The server responds with, “I don’t speak TLS 1.2, but I do speak TLS 1.0, so let’s agree to use that.” They then use that downgraded protocol as their preferred encryption method. The downgrade sequence could ALSO downgrade the encryption to use SSL 3.0, if necessary.

However, even in situations where client and server both support the use of the newer security protocols, an attacker with access to some portion of the client-side communication could disrupt the network and force a downgrade to the SSL 3.0 encryption. This is typically referred to as a man-in-the-middle attack, because the attacker sits on the network between two parties and captures their communication stream. This is an altogether separate type of attack, unrelated to the POODLE vulnerability itself, and must be defended against using other methods.

Anyway, now that the attacker has successfully forced SSL 3.0 encryption to be used, and the attacker has access to the communication stream, the attacker can attempt the POODLE attack and get access to decrypted information between the client and the server.

When this vulnerability came out, there was a significant amount of work done worldwide to mitigate the impact and scope of the issue. The vulnerability in SSL 3.0 itself couldn’t be remediated because the issue was fundamental to the protocol itself. Because of this, the best solution for organizations was simply to disable support for SSL 3.0 in their applications and systems.

So That Was 3 Years Ago….

As described in the links at the bottom of this article, Microsoft still supports the use of TLS 1.0 and 1.1 for clients connecting to the Office 365 service. However, due to the potential for future downgrade attacks similar to the POODLE attack, Microsoft is recommending that dependencies on all security protocols older than TLS 1.2 be removed, wherever possible. This would include TLS 1.1/1.0 and SSL v3 and V2.

The problem here is that many operating systems and applications have a hardcoded protocol version to ensure interoperability or supportability. In Windows 8 and Windows Server 2012 and higher, the default protocol that is used is TLS 1.2 – which is good.

However, in Windows 7 and Windows 2008 R2, TLS 1.0 was the default protocol. In fact, TLS 1.1. and 1.2 were actually configured as “disabled”. See the table below:


As outlined in the article “Preparing for the mandatory use of TLS 1.2 in Office 365”, this is going to present a problem if your organization is still using Windows 7/Vista clients. Why?

Because on October 31, 2018, Microsoft Office 365 will be disabling support for TLS 1.0 and 1.1. This means that, starting on October 31, 2018, all client-server and browser-server combinations must use TLS 1.2 or later protocol versions to be able to connect without issues to Office 365 services. This may require certain client-server and browser-server combinations to be updated.

Our internal telemetry of client connections indicates that this shouldn’t be a problem for most organizations, since the majority are not using TLS 1.0 or 1.1, anyway. However, for the network you manage it’s probably a good idea not to simply assume everything will be great. 😊

As an example, if you’re using any on-premises infrastructure for hybrid scenarios or Active Directory Federation Services, make sure that these infrastructures can support both inbound and outbound connections that use TLS 1.2.

How Do I Know if I Need to Take Action?

A new IIS functionality makes it easier to find clients on Windows Server 2012 R2 and Windows Server 2016 that connect to the service by using weak security protocols.

https://cloudblogs.microsoft.com/microsoftsecure/2017/09/07/new-iis-functionality-to-help-identify-weak-tls-usage/

There are also some simple checks available from Qualys Labs to check browser compatibility – https://www.ssllabs.com/ssltest/viewMyClient.html as well as the certificate and encryption configuration on your servers with SSL certificates – https://www.ssllabs.com/ssltest/ .

Hopefully these checks will help you to ensure that your organization is ready when the change is made to the Office 365 services early next year.

Additional Resources

Preparing for the mandatory use of TLS 1.2 in Office 365

https://support.microsoft.com/en-us/help/4057306/preparing-for-tls-1-2-in-office-365

Solving the TLS 1.0 Problem

https://www.microsoft.com/en-us/download/confirmation.aspx?id=55266 

Disabling TLS 1.0/1.1 in Skype for Business Server 2015 – Part 1 and 2

https://blogs.technet.microsoft.com/nexthop/2018/04/18/disabling-tls-1-01-1-in-skype-for-business-server-2015-part-1/

https://blogs.technet.microsoft.com/nexthop/2018/04/18/disabling-tls-1-01-1-in-skype-for-business-server-2015-part-2/

Implementing TLS 1.2 Enforcement with SCOM

https://blogs.technet.microsoft.com/kevinholman/2018/05/06/implementing-tls-1-2-enforcement-with-scom/

Exchange Server TLS Guidance

https://blogs.technet.microsoft.com/exchange/2018/01/26/exchange-server-tls-guidance-part-1-getting-ready-for-tls-1-2/

https://blogs.technet.microsoft.com/exchange/2018/04/02/exchange-server-tls-guidance-part-2-enabling-tls-1-2-and-identifying-clients-not-using-it/

https://blogs.technet.microsoft.com/exchange/2018/05/23/exchange-server-tls-guidance-part-3-turning-off-tls-1-01-1/

Intune TLS Guidance

https://blogs.technet.microsoft.com/intunesupport/2018/06/05/intune-moving-to-tls-1-2-for-encryption/

Preparing for TLS 1.0/1.1 Deprecation – O365 Skype for Business

https://techcommunity.microsoft.com/t5/Skype-for-Business-Blog/Preparing-for-TLS-1-0-1-1-Deprecation-O365-Skype-for-Business/bc-p/223608

Moving Your Office 365 Groups to Microsoft Teams – Getting Past the Gotchas

By now, most of us know that Microsoft Teams is built on Office 365 Groups. Additionally, many customers had been using Office 365 Groups for some of their collaboration before Microsoft Teams was released. That means that there are a number of Office 365 Groups out there, that may need to be converted to Microsoft Teams. The general process for using an Office 365 Group as the foundation for a Microsoft Team is well documented, and it would seem to be fairly straightforward. However, as anyone who has actually done this knows, it isn’t quite that simple.

The purpose of this article is to help you move the data that may exist in your Office 365 Group – such as email, OneNote, Planner, etc…over to a newly created Microsoft Team.

We’ll start with a brand-new Office 365 Group, create some content and then convert everything over to a new Team.

Let’s get started…


Creating the Office 365 Group and Populating it with “Stuff”

Let’s start by creating a new Office 365 Group so we know exactly what happens.

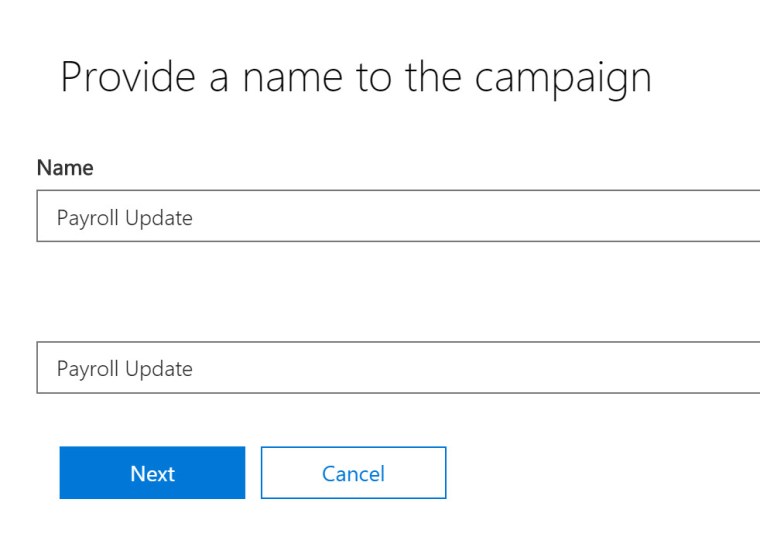
Here, I am creating an Office 365 Group named O365-TeamsUpgrade. Notice that it has been created with the default Privacy setting of “Private”.


Next, I add some of my team members to the Group.


Now my Office 365 Group is ready to go, and I have all the usual things in my configuration.


I can send email to the group, because every Office 365 Group has an associated email address. As expected, the email and meeting invites show up in the Office 365 Group mailbox, which exists in Exchange Online.


I go to Files and create a Word document.


Next, I go into my Notebook and create some content in the Office 365 Groups OneNote


I can go into Planner next and create some content there….


Lastly, I click on the Site link and I see the SharePoint Site.


If I go to the Documents library I see the Word document that I created just a few minutes ago.

So, we all agree I have legitimate content in my Office 365 Group, right? Right.

Okay, now comes the fun part –converting it to Microsoft Teams.


Upgrading to a Microsoft Team

In my Microsoft Teams client, I click “Add team”.


Next, I click on Create team.


In the next dialog box, I can create a brand-new Team, or as shown below, I can create one from an existing Office 365 Group. That’s what I want to do, so I click on that link.


It now provides me with a list of the Office 365 Groups for which I am the Owner, and which are set to Private visibility.


I click the radio button and click Create team.

NOTE:

When upgrading an Office 365 Group to a Microsoft Team, there are several points that you must keep in mind:

You must be the Owner of the Office 365 Group

The Office 365 Group visibility must be set to Private. If it is not set to Private, you can set it to Private long enough to do the switch and then turn it back to Public once you’ve switched it over to a Microsoft Team.

There cannot be a Team that already exists with the name of the Office 365 Group you intend to convert. If it exists already, you’ll end up with two disconnected objects. For example, I created a brand-new Team with the same name as my Office 365 Group.


It lets me create the Team with that name, but it doesn’t bring over any of the content from the Office 365 Group with the same name.


Lastly, Teams doesn’t support these characters: ~#%&*{}+/:<>?|'”.. This, if any of your Office 365 Groups are named using those characters, you won’t be able to convert them to a Microsoft Team without renaming them.

Not cool, man…not cool

So far, everything is going just swimmingly, wouldn’t you say? Now I just open up my brand-spanking-new Microsoft Team and I see all the stuff from my old Office 365 Group, which has been converted over, just like magi……..wait….what happened? It only moved over the group membership? Where’s my super important Word document???? Where’s my Planner? Where’s the OneNote?


Let’s investigate…

Files

If we go back to our Office 365 Group (it still exists), we see our Word document still sitting in the Files area. On the far-right side, click on “Browse Library”.


Microsoft Teams stores documents and files in a folder in the SharePoint Document Library which is named for the Channel.  By default, the only channel that exists in a new Microsoft Team is named “General”. Therefore, the SharePoint library shows me that my Word document is sitting outside of the General channel, as you see below.


If I select my Word document and click on the ellipsis, I can choose to move the document.


Let’s move it to the General folder. You can move all of your documents to the General folder, or if you have more channels in your Team, you can move them to any channel you like.


I now go to my Team and there’s my Word document in the General folder!


OneNote

But wait, I also had some business-critical information in OneNote. Where did that go?

Well, unfortunately there aren’t any really great options for moving your OneNote from an Office 365 Group over to a OneNote in Teams.

Here’s one way to do it:

In your Teams client, go to the channel of your preference, and click on the “+” sign to add a tab to that channel. In this case, I’m adding a tab to the General channel.


You’ll be presented with a number of options. Select the one that says OneNote.


Create a new OneNote notebook, and name it whatever you like. For my example, I’ll name it O365-TeamsUpgrade01


If I go back now to my Office 365 Group, I see the newly created OneNote notebook, and it exists beneath the notebook that existed already.


Now I can copy the individual pages from one notebook to the other. I right-click on the page and select “Copy”.


I switch over to the new notebook, right-click and select “Paste”.


For my example, I deleted the “Untitled Page” and I’m left with only the page from my original OneNote.


And back in my Microsoft Teams client, everything looks good as well.


Planner

Mercifully, moving your Planner files over is relatively easy.

First you go into the new Microsoft Team and select the “+” sign to add another tab to the appropriate channel. Click on the Planner icon.


In the next dialog window, select “Use an existing plan”, and from the drop-down menu, select the name of the appropriate Office 365 Group.


And just like that, all your Planner information is switched over to Microsoft Teams.


Email

The last thing that needs to be converted over is email.

Again, there unfortunately isn’t a great story there yet. Here’s one idea that you can use.

As we have seen, each Team channel has its own email address. You can get that email address by going to the channel (such as General), clicking the ellipsis and selecting “Get email address”.


Copy the SMTP address, which is the section that’s highlighted below – 62057b2c.microsoft.com@amer.teams.ms (Yours will be different).


Now, go back to your Office 365 Group, select the email you want to move and click on “Forward”. In the new email window, copy the email address for the Teams channel into the “To” field in the email and click “Send”.


Go back to your Teams – General channel and you’ll see the email that has been forwarded from the Office 365 Group email inbox.


This is definitely not the easiest process in the world, and it tends to be error-prone if you have lots of email, but it will get the email conversations moved over.

Now, there may still be some people who will accidentally use the Office 365 Group email address. How do you account for that? One way is to add the new Microsoft Team as a member of the Office 365 Group.

Go in to the membership of the Office365 Group and click “Add members”.


In the dialog window, select the email address of the Microsoft Teams channel where you want the new emails to be delivered.


In my case, I select the email address beginning with “62057b2….” and click “Save”.

Next, go into the Group settings and select “Manage group email”.


In the dialog box, select “Follow in inbox” and click “Save”.


Now, when an email is sent to the address of the Office 365 Group, it is also sent to the email address of the Microsoft Teams channel that I have designated, as you can see below.


Well, that was easy, wasn’t it?

Obviously, I’m being a little sarcastic…this isn’t the easiest process, and there are certainly ways that much of it can be scripted, but for a quick and dirty way to move a few Office 365 Groups over to Microsoft Teams, it should be sufficient for your needs.